
How to Raise a Bug in Jira | A Thorough Step by Step Guide
We are going to take a look at how to raise a bug in Jira in this tutorial. This might sound like a walk in the park for pros. But hang in there, for not everyone knows really how.
In a software testing environment, raising a bug is a given. While there are many software bug tracking system available, Jira is the most popular one.

There is another popular bug or defect tracking tool called Fogbugz which is pretty famous. Industry uses that a lot too. But Jira is like the big daddy of defect raising, owing to the ease of access it provides and how simple it is to maintain.
Assuming you have an account in Jira already, this is how easy it is to raise a bug. Just follow these simple steps.
Steps to raise a Bug in Jira
Hope you have opened Jira and logged into it. Let’s move forward from there.
Step 1: Click on the + button available on the left hand side of the screen. You can check out the image for the precise location.

A small dialog box would open then. This is where you are supposed to give all your inputs.

Step 2: Click on the first dropdown to select the project you wish to enter. Make the selection, by ensuring the correct project you are working on. It is like a high level filter that places similar bugs under one roof.

Step 3: In the next dropdown, you have to select the issue type. Select “Bug” if it is not already selected. If it is already selected, you might not find it in the dropdown.

NOTE: A thing to notice here is that when you select an issue type, everything beyond that point automatically changes.
Step 4: Enter your name in the next text box that says “Source”. It wishes to know where has this bug originated from.

Step 5: Next, click on the Assignee drop down. It will list down all the members and teams working in your organization. Select the one that the ticket is supposed to go to.

If there is a separate QA Assignee, that the ticket should go to, you can start typing the name of that person in the “QA Assignee” box. Same holds true for PO Assignee. Since I don’t have to deal with it here, I am gonna leave it blank.
Raise a Jira Bug – Understanding Priorities
Time to provide a priority to your bug.
Step 6: Click on the dropdown and you will find plenty of priorities stowed in there.

Let’s have a look at them.
In a testing environment, you can have multiple priorities. Based on the urgency of a functionality that has stopped working or an issue that has stopped a certain functionality, or that has forced you to halt, priorities have been defined. That is to say, their import goes hand in hand with functionality of the system. They have been listed below:
- P1 – Blocker: Something that stops you from moving ahead. Means your testing has stopped because of this bug.
- P2 – Critical: Next level critical stuff that has caused a particular functionality to stop working. But it doesn’t stop your work.
- P3 – Major: Not that critical. But it is pretty important since it is something an end user might come across and affect business
- P4 – Minor: Doesn’t affect anyone’s work. System works smoothly. Can be fixed at a later stage.
- P6 – Tabled: Lowest of all priorities. Kept to be taken up when nothing is on the table.
- P7 – Unprioritized: An issue that has not been provided any priority.

So if your bug is trivial, like a cosmetic error on the application, and doesn’t affect anything, you can mark it as trivial.
Step 7: I am going to go ahead and mark it as trivial.
The next part is where you define your issue under a component. Your application is basically broken down into many components so that working on that becomes easier for a team.
Step 8: Select Components from the component dropdown. You can just start typing if a component has been created with that name, it will auto-suggest.

Step 9: Time to punch in a summary of the issue. You should be precise enough to give the idea to the assignee by being taciturn and yet vocal.

User story is, as the definition states, a place where you can define the what, the who and the why of your story.
Step 10: You can leave it blank also, since you are anyway going to enter stuff in the description textbox. But that is again the developer’s preference. Many provide a gist of the bug in the user story.
How to Write your Description
There is an art to explaining things to people. When you are crisp and unequivocal, the assignee to whom the bug is assigned will not have to approach you to understand the issue. One look at your description and they will know what’s wrong.
I have framed a proper template for how to write a description in Jira, that intends to take care of your issue in a single go. Then again, you can provide other specific things like Test Data and Preconditions. To be candid, it all depends on business requirements.
Step 11: Type things like “Environment”, “Summary”, “Preconditions”, “Steps to Produce” explaining what all should the assignee do to reproduce the issue.

Ensure you cover all the steps. Be very thorough. Then towards the end mention what is the Actual behaviour, and what you Expect the system to behave like.

The rest of the fields like story points, original estimate (as to what the Manager thinks), remaining estimate, fix versions and which sprint it is supposed to be a part of, or Epic Link are all Senior Developer’s area. Then in many cases it isn’t. Always advisable to ask your seniors, as to what they expect.
Step 12: You can leave them blank too.

Step 13: Provide a label that works basically like a tag. It groups similar issues in one place. So that when an assignee picks it up, they can simply search all the issues people have put under a certain label and start working on them.

If your raised bug affects another issue in one way or the other, you can provide details by selecting the condition from the linked issues dropdown. Then add that earlier raised issue by seleting it from the dropdown. Use + for multiple.

Step 14: I am leaving both of them as is since mine doesn’t relate to any.
Step 15: The last field basically allows you to select a deadline. Since, it is not something a tester should give a developer (only in special cases), you can leave it blank.

Step 16: The last step is simply to click on a button.
You heard that right, once you are done simply click on the Create button.
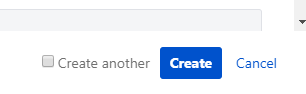
Congratulations! You have just created your first bug.
But wait! You didn’t get a chance upload screenshots of your issue. Don’t fret! That happens in the next screen.
Post Bug Stuff
If you have taken screenshots of the issue as well, you would want the developers to have that too. So they get a good picture of what all is really happening.
In the next screen that opens for you, after you have clicked Create, look for the following symbol:

In the next dialog box that opens, click on Upload and select your screenshots. You can also simply drag and drop.
Once done, click on Save and the screenshots will get attached too.
How to Edit Description
Find an issue with the description? Simply click on the description text box and it will let you edit it. Once you have updated it, click on Save.

That will make the updates. As simple as that.

Like this tutorial? Check out more cool learning stuff on Dumb It Dude.


Nice explanation
glad to help, thanks 🙂