
How to Create a Batch File to Run Testng.xml
Let us learn how to create a batch file to run testng.xml. Dealing with automation, don’t you want your test cases to run automatically without you having to lift a finger? Creating a batch file is the first process to achieve that. Then you can go on to integrate it with a scheduler of your choice or simply integrate it to work with Jenkins. The choice is yours, and of course, if you are working in a company, at the end of the day, your client’s.

What is a Batch File
No matter how fast the technology moves forward, you are always going to come back to the basics for one thing or the other. MS-DOS, for example, is the underlying niche from which everything began for Microsoft. That’s where a batch file comes into the picture.
A batch file is nothing but a script file containing a sequence of commands that you store in a text file. It is something that is executed by the command line interpreter. enter through the command prompt (DOS). It is equivalent to what a shell script is in a UNIX based operating system.
So if you want to execute a certain command you can do so directly from the command line (cmd).
Let us quickly create a small batch file to open “Google“.
An Example of a Batch File
Step 1: Open notepad and type the following in it:
start “” www.google.com

Step 2: Save the notepad file as a batch file meaning provide the extension of the file as .bat like this:

I have named it ping. You can name it anything.
Step 3: After you have saved it to the desired location, open it by double-clicking it. You will notice that it will open the URL of Google:

So you get the gist of it. That you can perform any action that is possible on the windows using a batch file. You can prepare a series of commands to be executed one by one allowing a certain thing to happen using a batch file.
Now if that part is clear, let’s move on to learn what we intended to learn in the first place. You guessed right: How to create a batch file to run Testng.xml
Steps on How to Create a Batch File to Run Testng.xml
I am assuming that you already have a testng.xml waiting to be executed using a batch file. Here’s the directory structure that I currently have:

As you can see my testng.xml file is directly located inside my project.
Creation of Lib Folder
Basically what we need in our batch is to specify classpath for both bin and lib folder. Since we already have bin created by default when you create a project in Eclipse, we will take care of the other one – lib.
So we gotta create a lib folder and place all the required library or jar files in there. We need to provide that reference later on inside our batch.
Step 1: So I will quickly create the folder by right clicking on my project name and the selecting New > Folder:

Time to rename it as “Lib”:

Step 2: Click on Finish when done.
Transfer all your required jar files (in this example just two) in this lib folder. To do that you need to first have the lib folder opened.
Step 3: Navigate to Eclipse and right-click on the lib folder. Then Select Properties:

Step 4: Then copy the location from there as shown above.
Step 5: Navigate to your explorer and paste the location that was copied in Step 4 in the address bar and then press Enter:

Your empty lib folder will be now open:
Step 6: Locate your library jar files in your drive, select them and right-click > Copy.

Step 7: Navigate back to the lib folder and paste them there, by pressing Ctrl + V or by right clicking and selecting Paste:

You can navigate back to your project folder and see we have both bin and lib in place:

Looks about right. Time to foucs on the batch file now:
Creating the Batch File for Testng.xml
Moving on to the batch file creation part in the How to Create a Batch File to Run Testng.xml tutorial.
Step 8: Open notepad by pressing windows + R and typing in notepad:

Time to set your project path first.
Setting up Project Path
Step 9: Locate where your project folder is and copy its path and then type it in the following manner in your blank notepad file:
set ProjectPath=C:\Users\prashant.singh03\Documents\trial
Your project path will be different of course. My project name here is trial.
NOTE: You can look for your project location by simply right clicking on your project in Eclipse and then selecting properties as was shown in Step 3.
Now until and unless you navigate to the folder where your project is in command prompt, your batch will not run properly. Hence we need to use the ‘cd’ (change directory) command to navigate to the exact folder.
Step 10: To do that, type the following then as the second line:
cd %ProjectPath%
As you can see in Step 9, we had already set a variable ProjectPath and assigned the location in there, we don’t need to type everything again. We can simply refer to that variable by squeezing it between % symbols.
Setting up ClassPath for Bin and Lib
Now we need to set up classpath for bin and lib so that the command line interpreter finds the files in the said places.
Step 11: Type the following for that:
set classpath=%ProjectPath%\bin;%ProjectPath%\lib\*
Since your bin and lib folders are located immediately inside your project folder, the above should suffice.
Now that the classpath has been set, time to finally use the line that would locate the testng.xml.
Step 12: Type the final line in the notepad as:
java org.testng.TestNG %ProjectPath%\testng.xml
The above-mentioned line will locate the testng.xml file in the given location and run it.
Making it a Batch File
As explained in the example earlier, we need to save this notepad file as a batch file.
Step 13: To do that click on File > Save as…

Step 14. Provide the file name as “trial.bat”(or you can provide any name just don’t miss the .bat extension). Select the Save as type as All Files. Then click on the Save button.
I am going to save it on my desktop.
Step 15: Once it has been saved, you can simply double-click it to run the batch. Or if you want the cmd to remain open so that you can see what has been run you can open it using cmd as well.
Running it from cmd, by navigating to the desktop and then typing the batch file name (here trial) and then pressing enter:
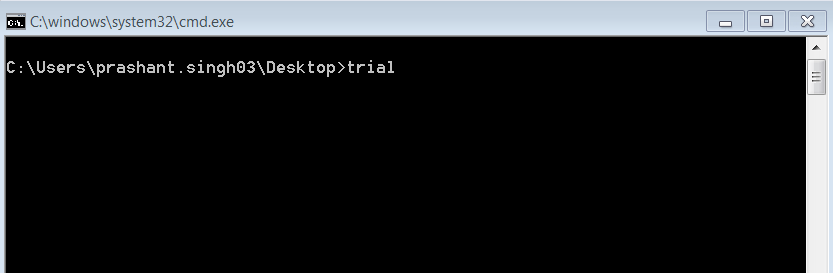
It will show you the following in the command line:

And will simultaneously execute it in your browser:

There! Works like a charm!
So now that you have created the batch file you can choose to use this either on Jenkins or use it in your very own Scheduler system to automate it.
Now that you have learned How to Create a Batch File to Run Testng.xml, go ahead and put it on a scheduler of your choice. Do that and you have already automated that.
Like our How to Create a Batch File to Run Testng.xml tutorial? Check out more tips and tricks from our website.


